

Hello Crafters!
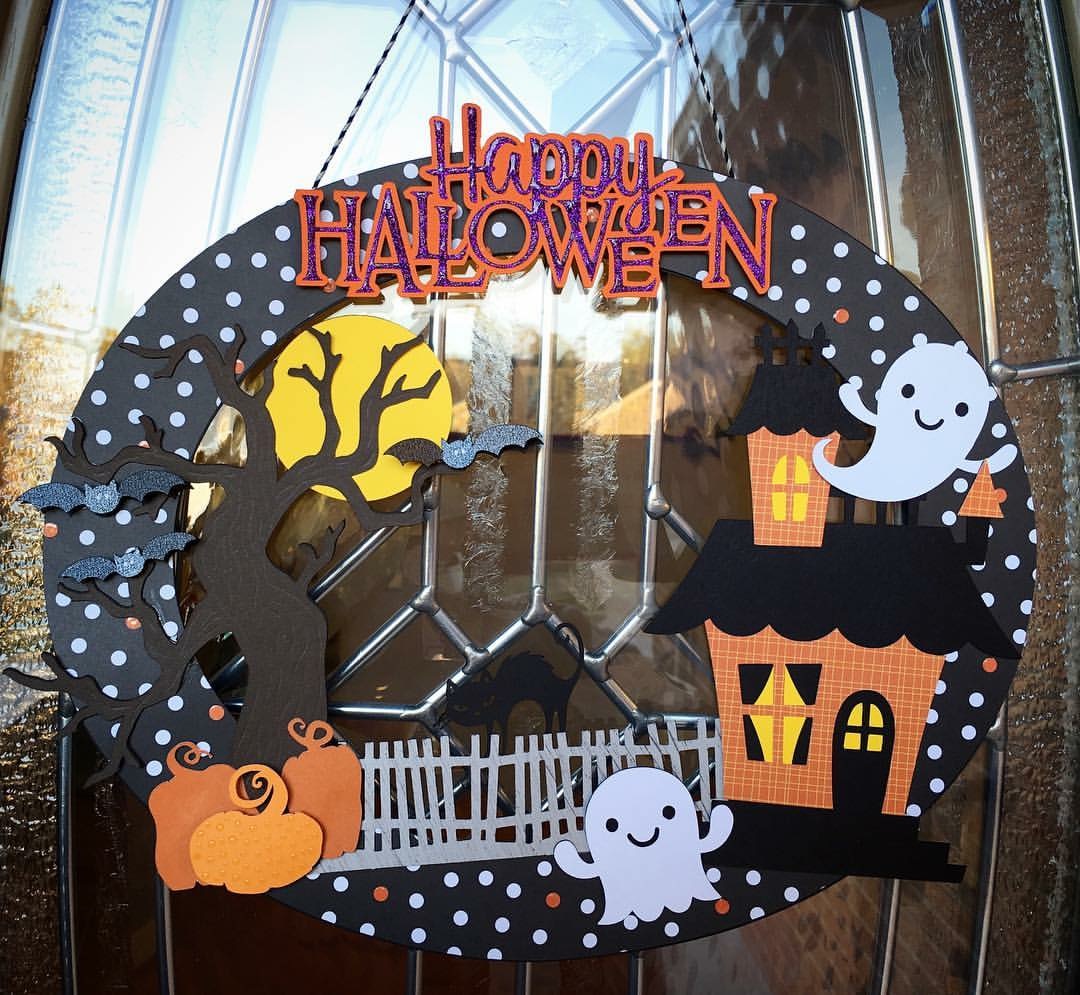
I know it has been a long time but I am finally able to get my craft on and share a project with you. I know Halloween is around the corner but I wanted to share a quick Halloween wreath that I created in Cricut Design Space. The cut file will be at the end of the post and I share a video tutorial on how to put it together.
All the images are included in Cricut Access.

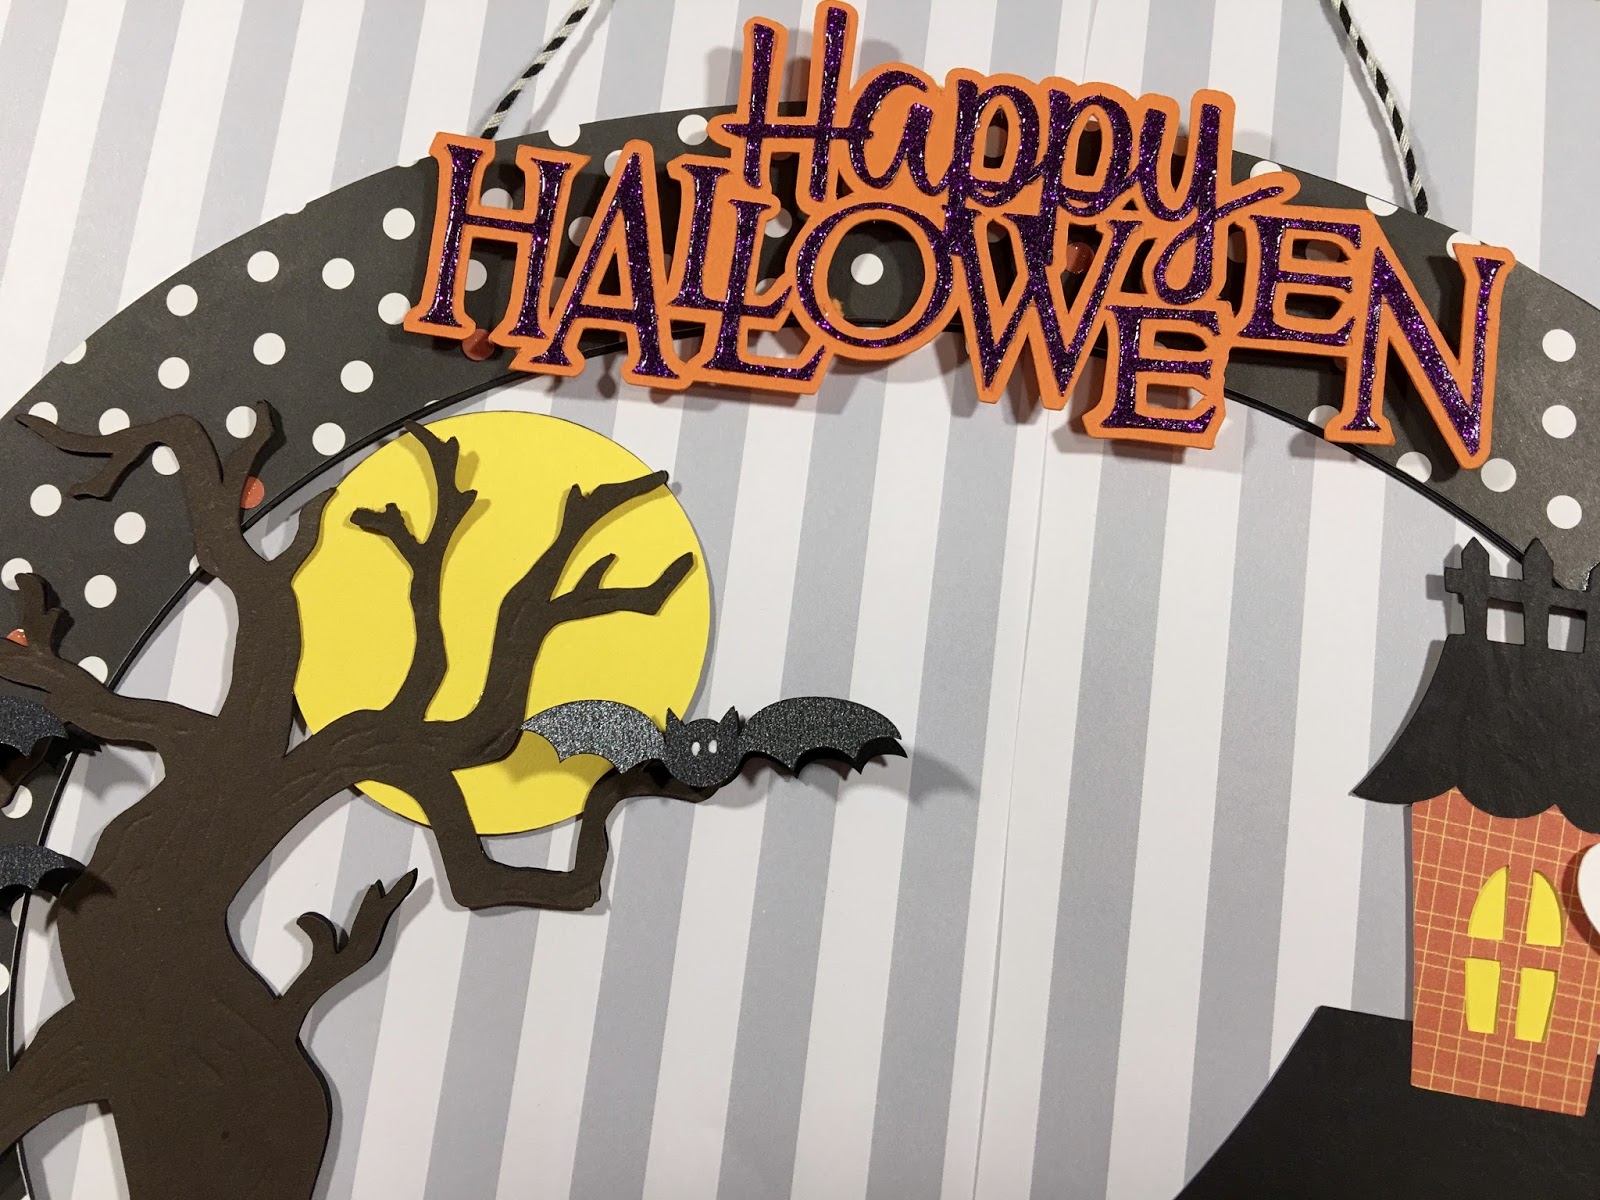
I used purple glitter paper for the title and covered the letters with Glossy Accents.
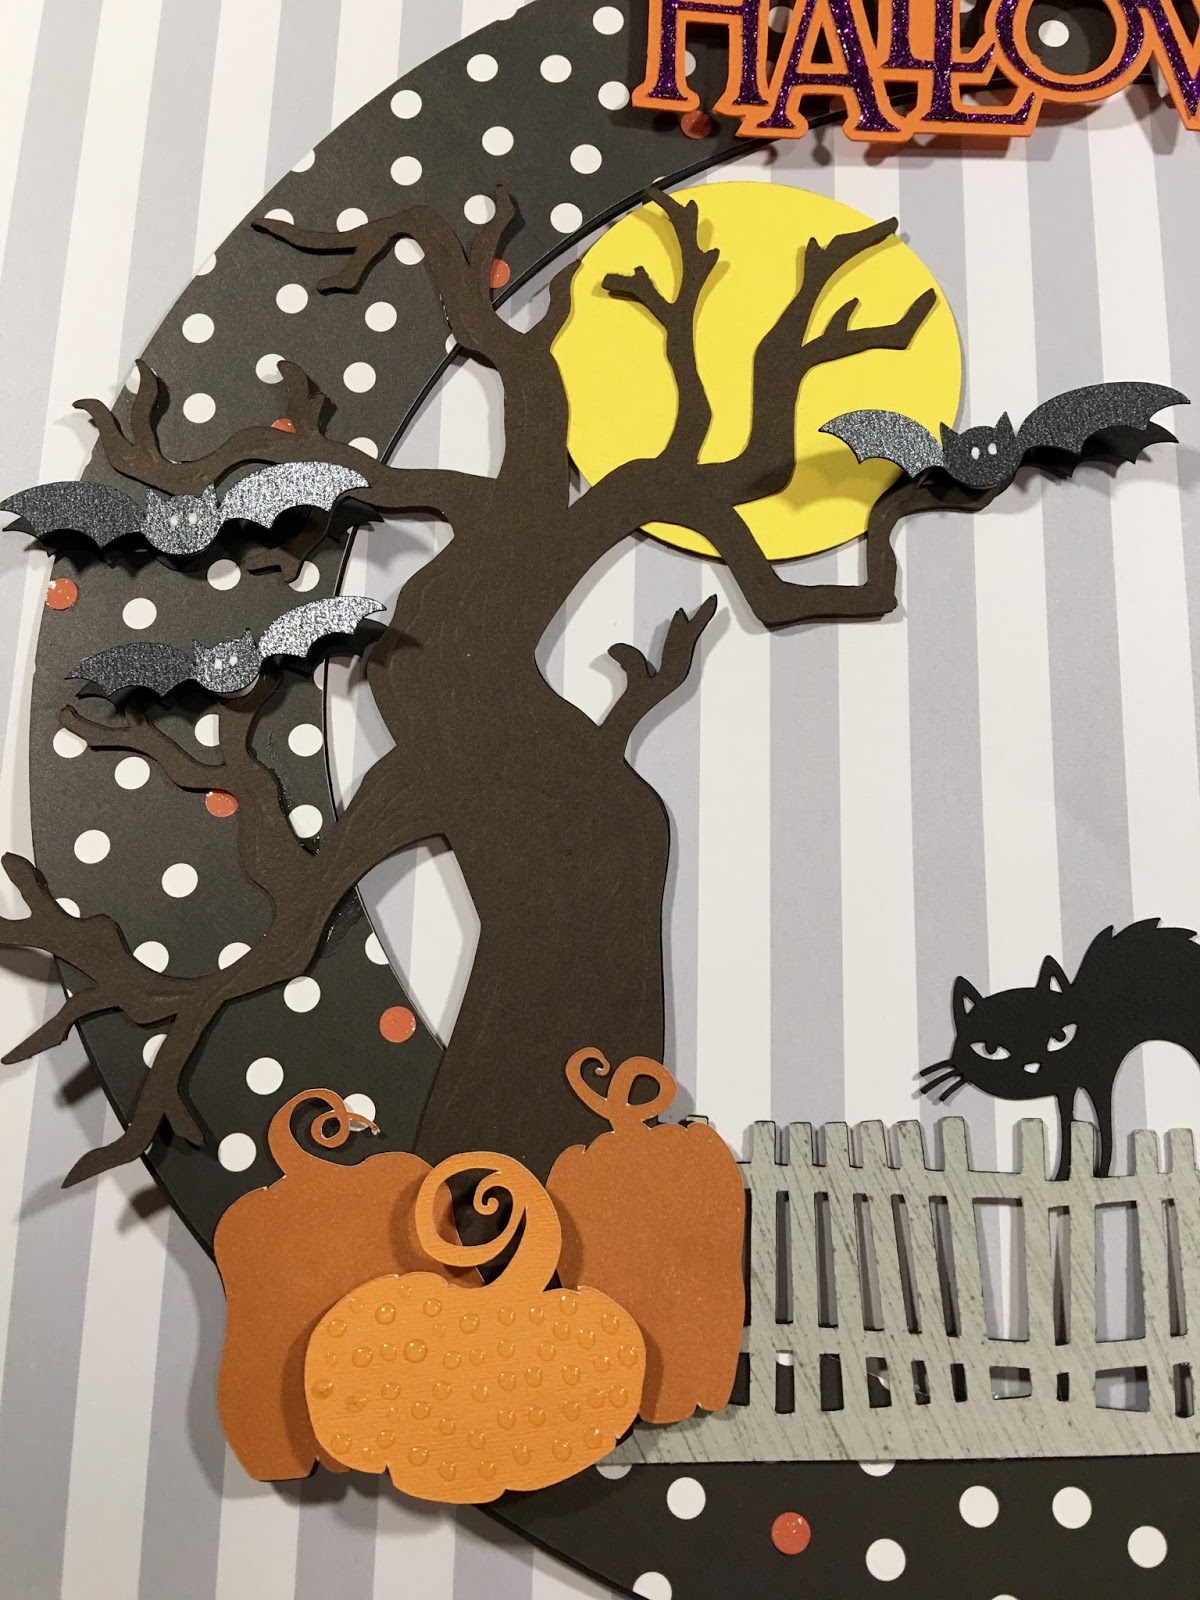
I used a white Jelly Roll pen for the bats eyes and used Glossy Accents to give my pumpkin some texture.
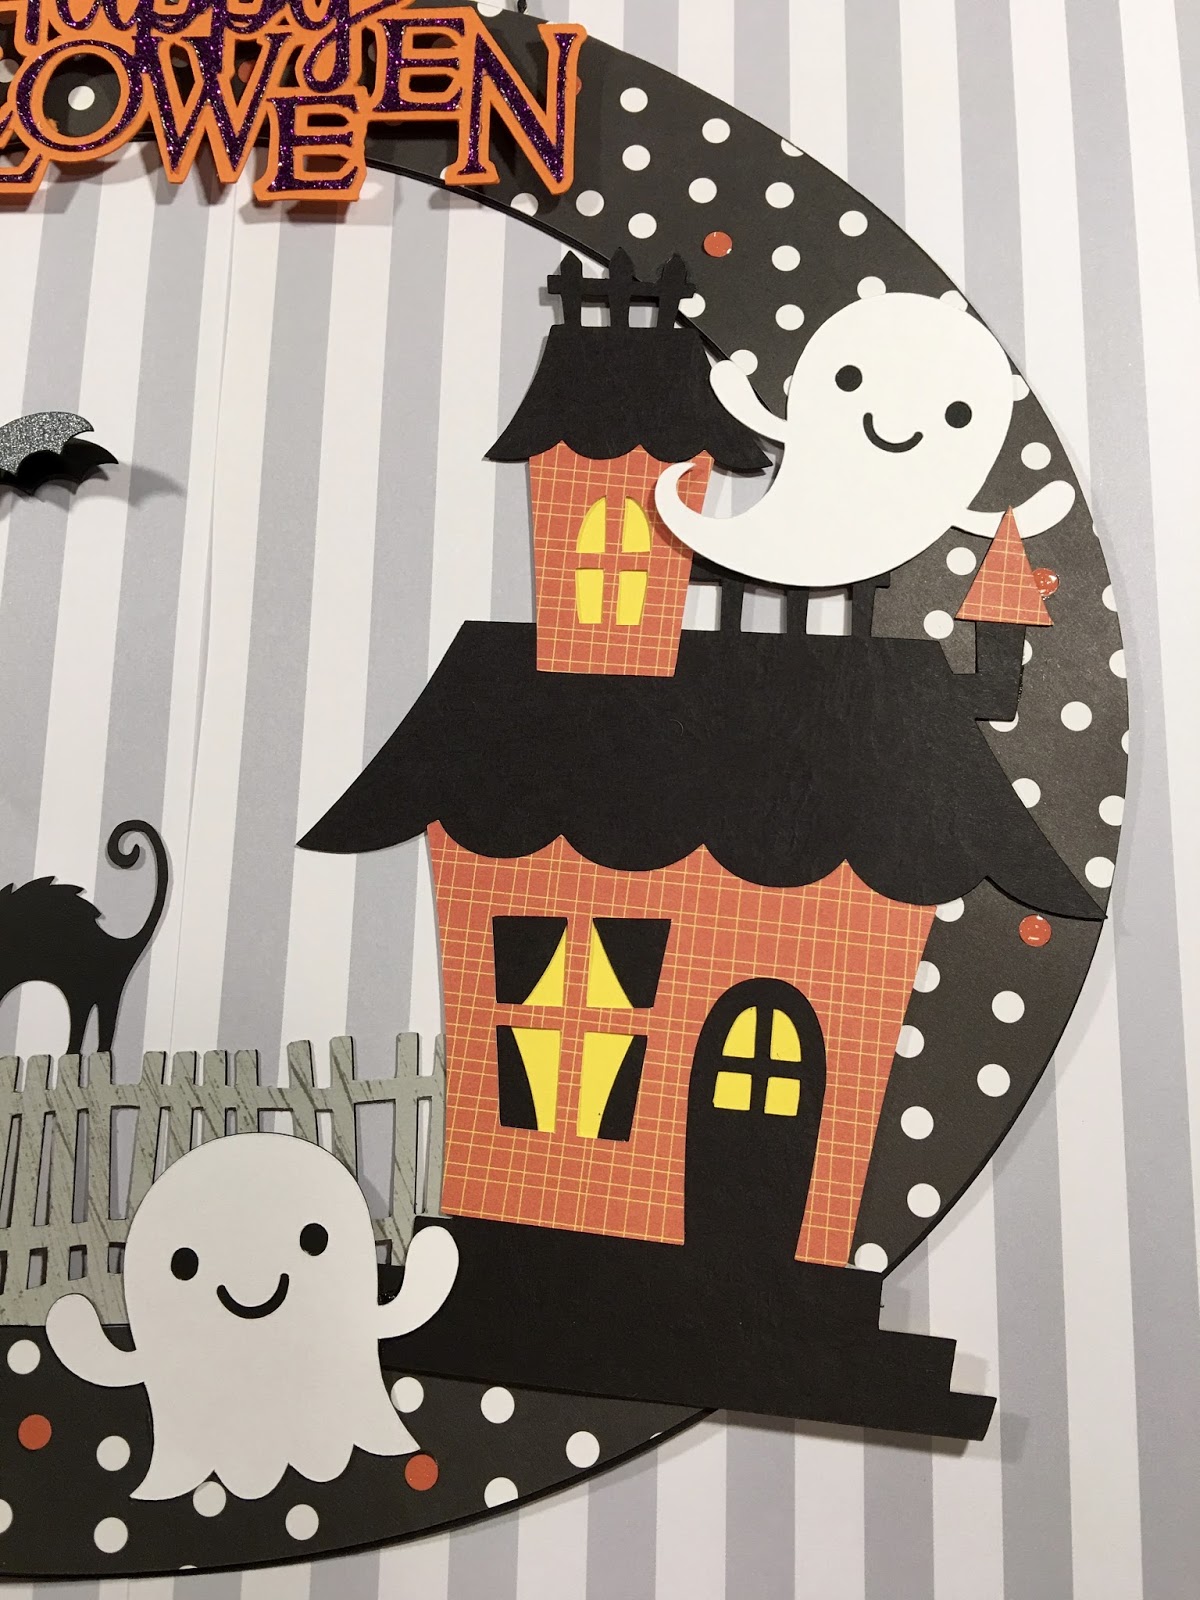
Nobody home but these cute ghosts.
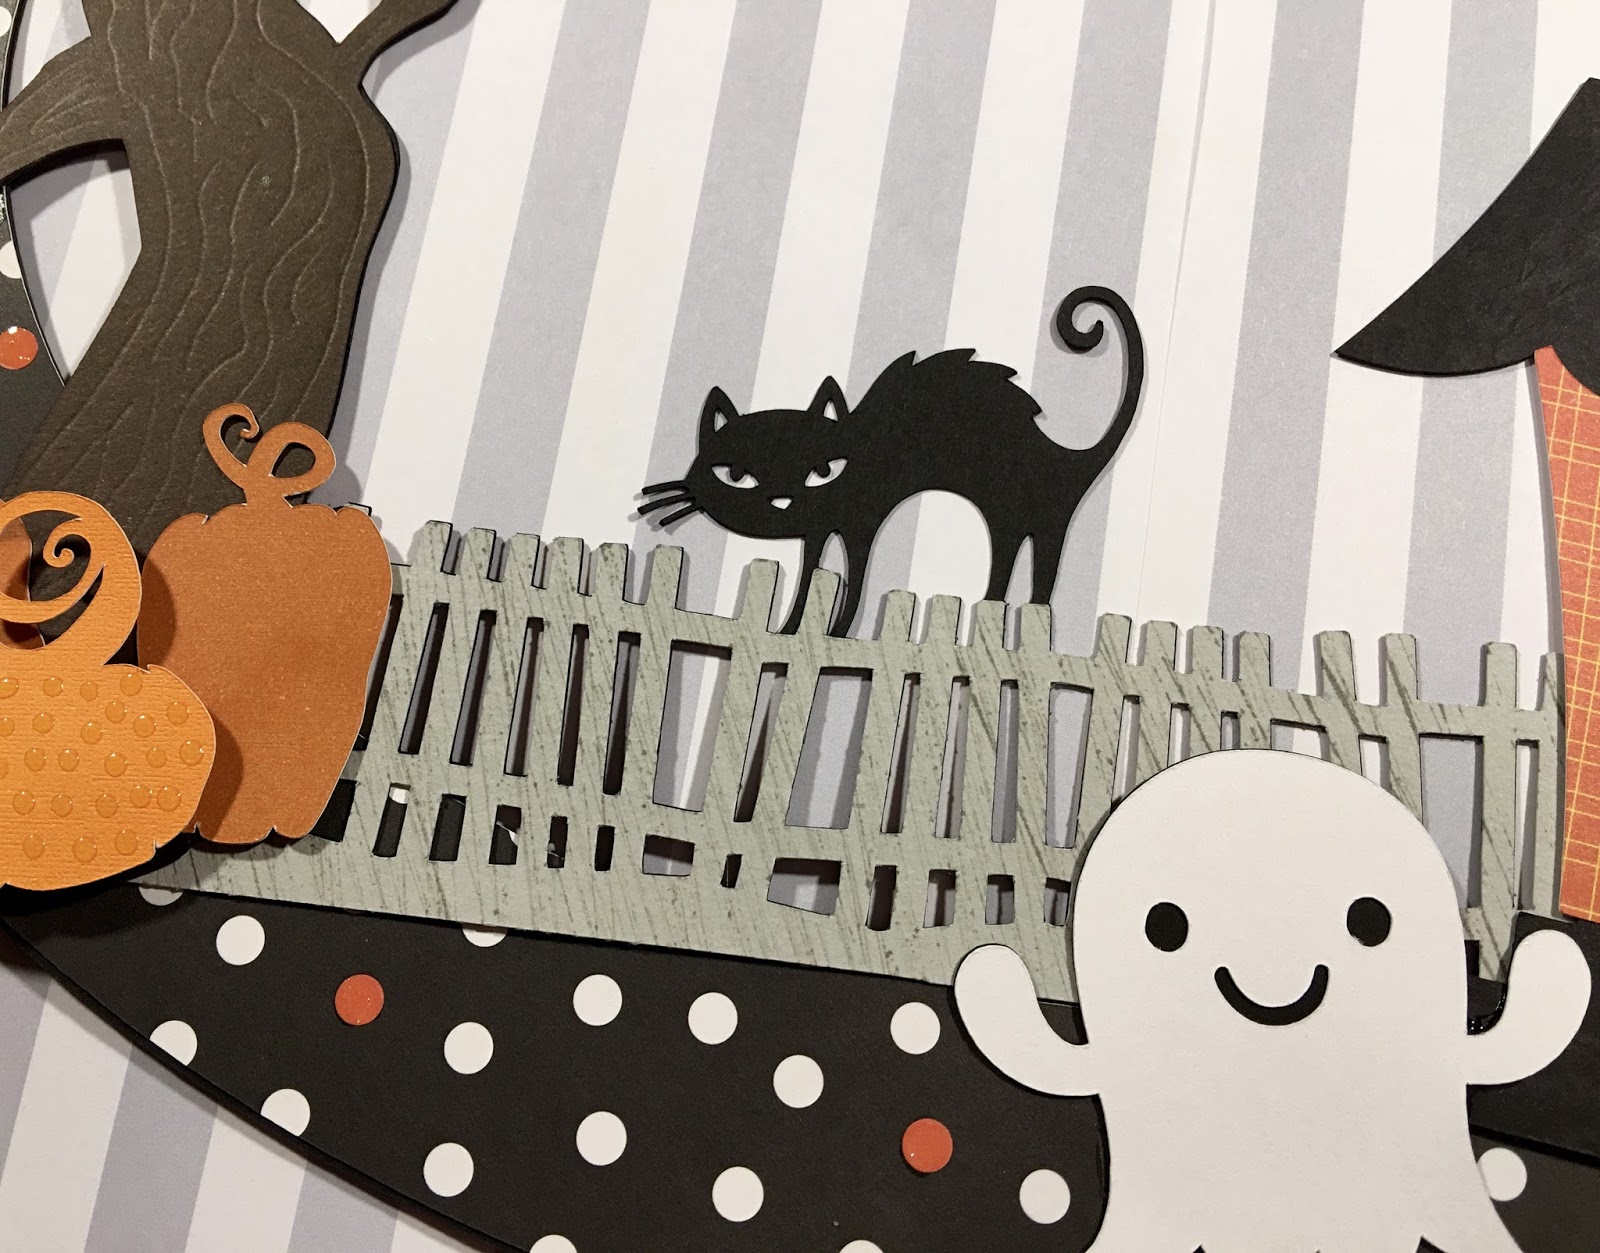
Don’t be a fraidy cat…use texture stamps to bring life and texture to plain paper. This is what I did to the fence.
Thank you for visiting and have a safe Halloween. Kim
Halloween Wreath – Part 1 or watch Here:
Halloween Wreath – Part 2 or watch Here:
Cricut Design Space cut file: https://us.cricut.com/design/#/canvas/45715550

Thank you so much for sharing this. It is absolutely gorgeous and I plan on making it. I can't wait to look and see what other projects you have made. You are so talented. Would you tell me what the tool you use to attached the string and some of the other pieces to the project? Thanks again for sharing
LikeLike
You're so sweet. The tool I used was the Tim Holtz Tiny Attacher; it uses tiny staples that are included. I bought mine at Michael's with a 40% off coupon. Thanks for stopping by. Kim
LikeLike
This is really beautiful – thanks so much for sharing. One question – what material did you cut frame out with? Thanks again for all you do! Truly talented
LikeLike
Thank you, Carol! For the base frame I used 3 layers of black card stock; I glued them together. Let me know if you have any other questions. Kim
LikeLike
OMG!!! Its beautiful!! I want to make a Christmas one!!
LikeLike
This is so wonderful! I wish I had seen it a couple of weeks ago, would totally have made this up for my office. Thank you for taking the time and energy to share this beautiful project!
LikeLike
Kim, OK so I decided to go ahead and make this ready for next year! I really love it. In the video you mention skewing the oval frame to make it fit on a 12×12 paper. Can you tell me how you did this? I skewed the image in the design space but when I hit go it's still straight up and down on the mat and looking for a 12×24? Thanks so much.
LikeLike
Hi! I have had this question before so I made a short video where I show how I set up my mat. Please, let me know if you have any other questions. https://m.youtube.com/watch?v=neQVmPKNN3o
LikeLike